HP Pavilion dv2000 blue screen
Here we have a HP Pavilion dv2000 with bad video card. When in this condition try to boot Windows we get a blue screen. In the moment when we turn it on, we see a green vertical lines on the black background.

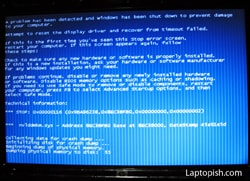
After we try to boot Windows, we get a blue screen.

This is consequence of the overheating of the laptop. Now we need to disassemble the laptop and rework the chipset (because this laptop is with embedded graphics in the chipset).
First we remove the battery and the power source for safety.

After this we remove the covers of the memory, hard disk drive and the WLAN card. To do this, we need to remove the screws assigned with red circles on the next picture.

Next we remove the hard disk drive by pulling in the direction of the red arrow.

Next we remove the screws from the bottom.

Next we remove the WLAN card. First detach the antennas and then remove the screws.

After removing all the screws from the bottom, we can remove the keyboard.

But beware for the flat cable.

The flat cables can be removed as shown on the next picture. First remove the clips in the direction of the arrows and then the cable in the direction of the arrow.

Next we remove the power button and the hotkey buttons panel. But first need to detach two cables as shown on the picture.

Next we remove the cables that go to the screen assembly. That mean that we need to detach the flat signal cable, cable for webcam and the antennas, that are assigned on the next picture.

Here we have detached the cables.

Next we need to remove the screws from the bracket how we can release the screen assembly. Here are from the left side.

Here are the screws from the right side.

Here we have removed the screen assembly.

Next we remove the screws assigned on the next picture.

We remove the optical drive and under the optical drive there are two screws that need to be removed.

After that we can remove the cover and we come to the motherboard. We need to detach the cables assigned on the next picture.

Next we detach the cables from the front audio panel and remove the screw from the motherboard.

Next we remove the WLAN switch by removing the two screws.

After this we can remove the motherboard. There are five screws that need to be removed how we can remove the cooler.

The fan jack is from the other side of the motherboard and need to be removed.

After removing the cooler we have this situation.

After cleaning we have this.

Now we do the rework of the chipset.
After this operation we need to clean the cooler. We remove the assigned screws.

After removing the fan, we have this. Here is the reason why it comes to the overheating.

After rework and cleaning we begin with applying a new thermal paste on the processor and new thermal adhesive on the chipset.

Next we mount the cooler.

After this we mount the motherboard in the laptop and repeat the process of disassemble only backwards.
Leave A Comment