HP Compaq Presario F700 overheating
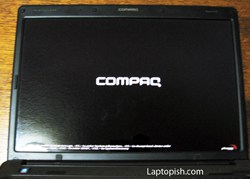
Here we have a HP Compaq Presario F700.

This laptop come to overheating, so now when you turn it on, only see this:

But we can still enter the BIOS. When i want to go to test the Hard Disk, i see this message: “Diagnostics not supported”, what mean that the Hard Disk drive is not recognized. But when the hard disk from the laptop we add as second hard disk on a desktop computer, the hard disk work’s fine.

So we conclude that we need to repair the motherboard (do a rework on the chipset).
Here is the cause of overheating. The cooler is full with dust.

This procedure we gonna explain step by step.
First we do is remove the battery and disconnect the power source from the laptop. Next we remove the assigned screws so how we can remove the covers. The optical drive can be removed by removing the screw assigned with red square and after that pulling in the direction of the arrow.

After this we remove the Hard Disk Drive simply by puling it in the direction of arrow.

After this we remove the screws from the bottom side, assigned with the red circles. With the red arrows are assigned the WLAN antennas that need to be detached from the WLAN Card.

After this we flip the laptop from the other side. First we remove the bezel that holds the power button, as show in the picture.

After this we remove the keyboard (beware for the flat cables).

After removing the flat cables assigned with red squares on the previous picture, next we release the WLAN antenna cables.

Next we remove the screw that hold the power button and couple other screws and flat cables assigned on the next picture.

Next we can remove the power button.

There are four screws that hold the screen assembly. We remove it and we can remove the screen assembly.

After removing the screen assembly we have this picture.

We remove the assigned screws and now we can remove the upper cover.

We remove the assigned screw and cable. Now we can lift the motherboard, but first we need to remove the cables that go to power jack and USB ports before we can remove the motherboard completely.

Here we have the motherboard removed from the laptop.

And from the other side:

Next we need to remove the heatsink and the cooler. We detach the cable and remove the assigned screws.

Under the heatsink are the chipset and the processor. We need to do a rework on the chipset, but before we do the rework we need to clean it from the old thermal silicone paste.

After this we do the rework.
After that we need to clean the cooler before we mount it again on the motherboard. There are four screws that need to be removed.

From the next picture we see why it comes to overheating of this laptop.

After all this done, we need only to assemble the laptop and the job is done.
1 Comment
Cool!! Great! Works prefectly now!!